Telfron · Social Publishing
Connect Facebook and Instagram, then publish with Telfron
An illustrated, step-by-step guide for connecting your own Instagram Business account through a Facebook Page and Meta app, then preparing photos or Reels in Telfron.
Updated 5 October 2026
Before you begin
- Use a Telfron license and user role that enable Social Publishing. Ask your administrator if the sidebar is missing.
- Have access to the Instagram account, a Facebook account with full control of the business Page, and your company’s Meta developer app.
- This guide uses Instagram API with Facebook Login. A personal Instagram account must first become a professional account linked to a Facebook Page.
- Keep passwords, access tokens, and App Secrets private. The screenshots use Telfron as an example; enter your own business details.
1. Convert Instagram to a Business account
- Sign in at Instagram using the account your company will publish from.
- Open your profile, then Settings. Find Account type and tools or Switch to professional account; labels may differ between the app and website.
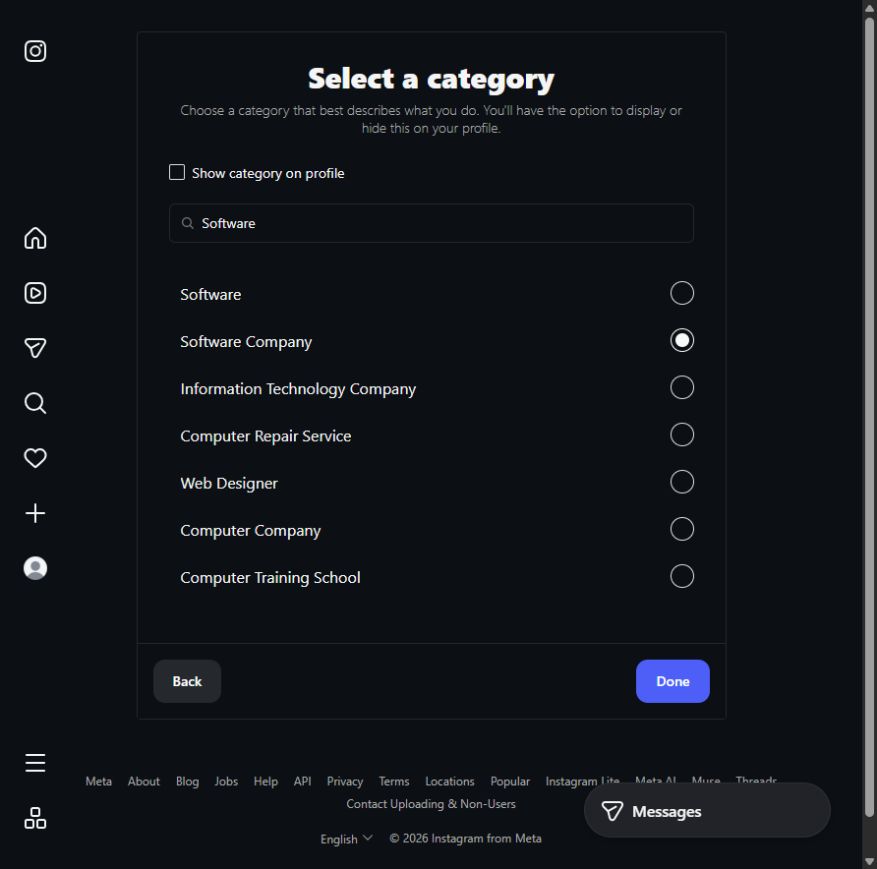
- Choose Business and select the category that describes your company. We selected Software Company for Telfron; choose an appropriate category for your business.
- Decide whether to display the category and business contact details. Only publish contact information you want customers to see.
- Complete the conversion and confirm the profile is a public professional account. The professional dashboard is a useful confirmation.
2. Create or choose the Facebook Page
- Sign in to Facebook with the person who manages the company’s Page.
- If you already have the correct business Page, reuse it. Otherwise choose Pages → Create a new Page.
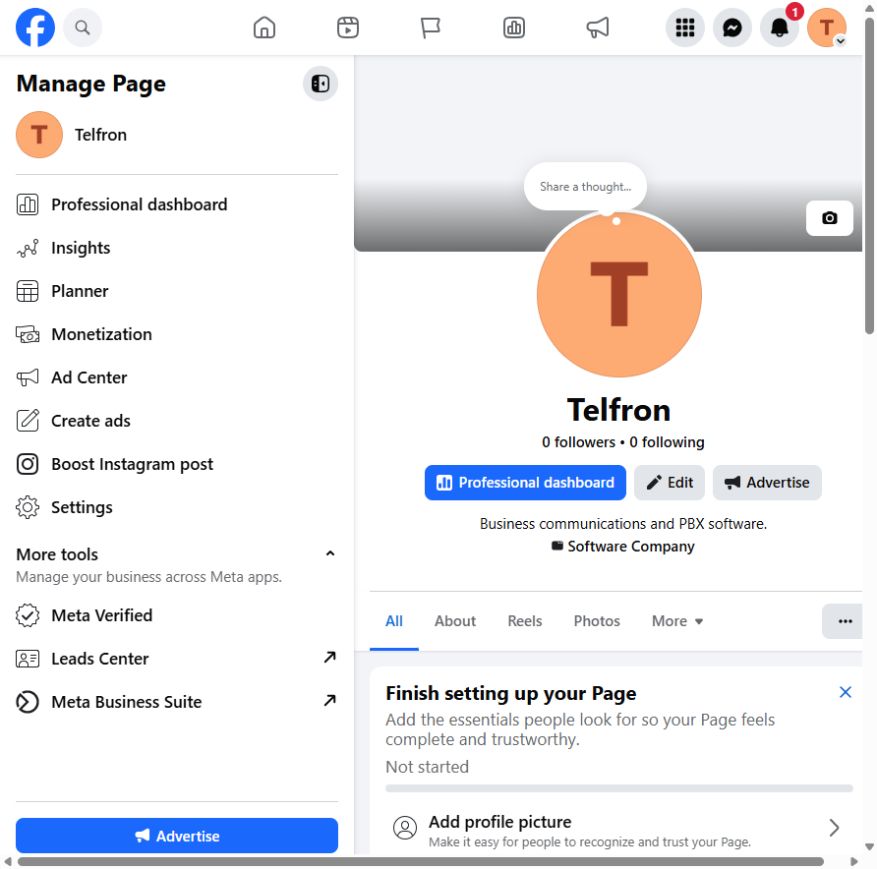
- Enter the business name, category, and a short description. Review Facebook’s terms before creating the Page.
- Add the official website and approved business information. Profile images and invitations can be completed later.
- Confirm that your Facebook user has full control of the Page. Do not select a similarly named Page belonging to another company.
3. Link the Page and Instagram account
- Switch into the Facebook Page and open Settings → Linked accounts → Instagram. Meta Business Suite may offer the same connection under Settings.
- Choose Connect account and sign in to the intended Instagram business account.
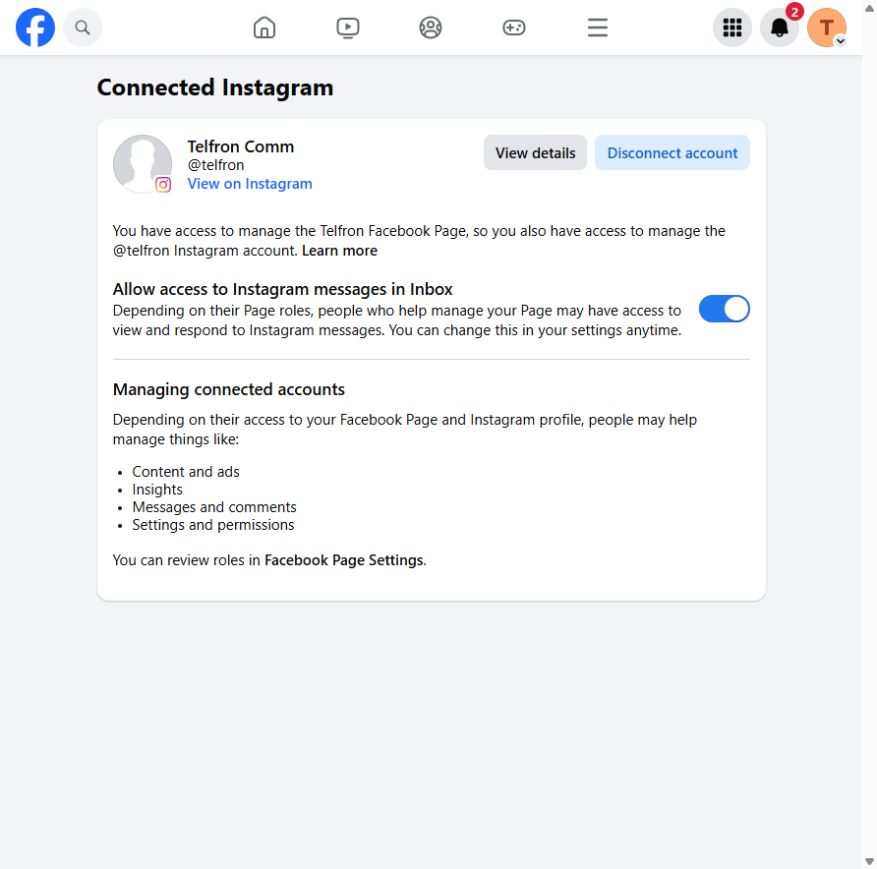
- Review the displayed Page and Instagram username, then approve the connection.
- Return to Linked accounts. Confirm it shows the correct Instagram profile and a connected status.
- Instagram messages in Inbox is a separate choice. Enable it only if your team needs inbox access; publishing does not require the Telfron app’s messaging permissions.
4. Register as a Meta developer and create the app
- Open Meta for Developers and sign in with your Facebook account.
- If prompted, complete developer registration, email or phone verification, and review Meta’s terms. Enter verification codes directly on Meta.
- Open My Apps → Create App. Use a business name such as Your Company Social Publishing and a monitored business contact email.
- Choose the use case for managing messaging and content on Instagram. Select your business portfolio if Meta requests one.
- Review the app details and terms, then create the app. Our example app is Telfron Social Publishing.
- Under the Instagram use case, choose API setup with Facebook login. Telfron’s current connector uses this flow; do not substitute an Instagram Login token or the separate -IG app ID.
5. Enable the publishing permissions
- In the app’s Instagram use case, open Permissions and features.
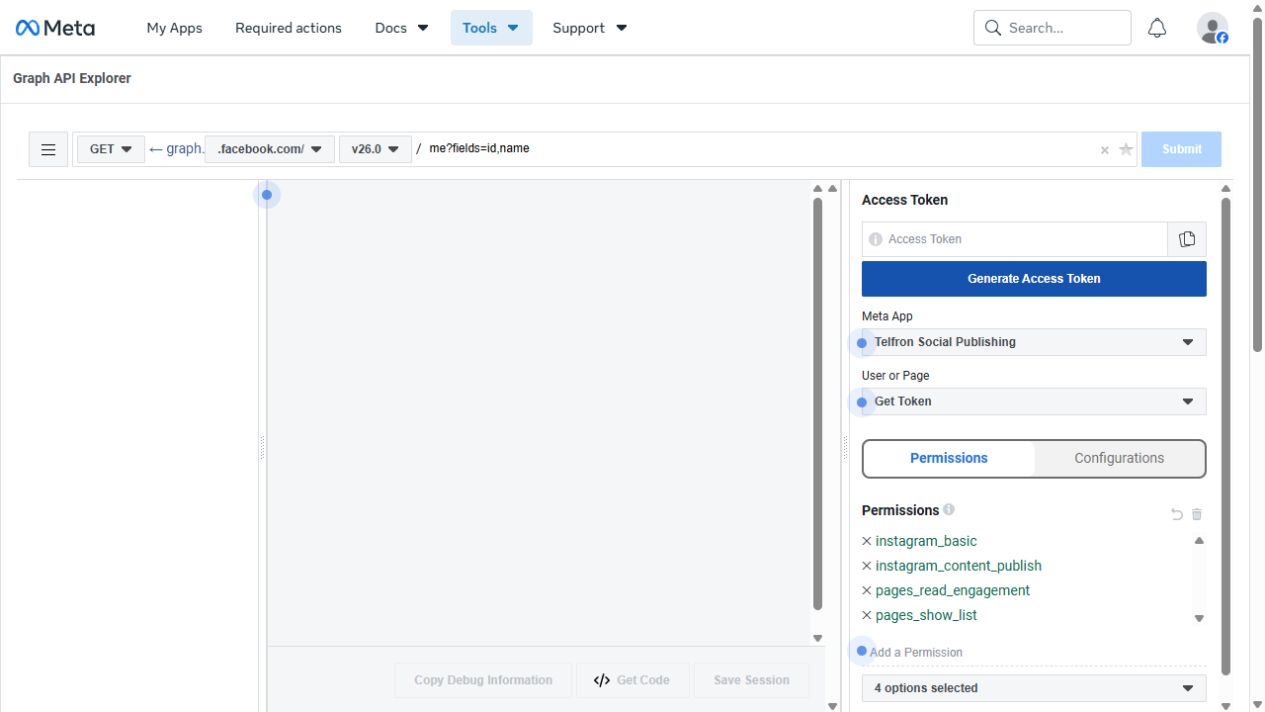
- Add instagram_basic, instagram_content_publish, pages_read_engagement, and pages_show_list.
- Confirm the permissions are available for testing. The spelling of the publishing permission is instagram_content_publish.
- Keep the scope limited to publishing. Messaging and advertising permissions are separate capabilities.
- If Meta specifically requires business_management for your business-owned assets, review that broader permission with your administrator before adding it.
| Permission | Purpose |
|---|---|
instagram_basic | Read the Instagram profile and media. |
instagram_content_publish | Create Instagram posts and Reels. |
pages_read_engagement | Read Page content, metadata, and engagement information. |
pages_show_list | Discover the Pages the user manages. |
6. Generate the Facebook user access token
- Open Graph API Explorer. Select the app you just created.
- Choose Get Token → Get User Access Token. Add the four publishing permissions listed above.
- Click Generate Access Token. In Meta’s authorization dialog, select your company’s Page and Instagram account.
- If the dialog does not open, click Generate Access Token directly in your browser and check whether the browser blocked the popup.
- Keep the generated token private. Copy it only into the Telfron account connection form; do not send it in chat, email, or screenshots.
- For scheduled or ongoing publishing, arrange Meta’s supported long-lived user-token flow and renewal. An Explorer token is suitable for initial verification but may expire. Telfron does not automatically extend a token just because an App Secret is supplied.
7. Find and verify the Instagram professional account ID
- In Explorer, keep the Facebook user token selected and submit GET me/accounts?fields=id,name,instagram_business_account.
- Find the object for your company’s Facebook Page. Copy the numeric id inside instagram_business_account. The Facebook Page ID and the Instagram ID are different.
- If the correct Page is missing from the list but you know its Page ID, test GET YOUR_PAGE_ID?fields=id,name,instagram_business_account. Check the returned Page name before using its Instagram ID.
- Verify GET YOUR_INSTAGRAM_ID?fields=id,username,name. The response must show your intended Instagram username.
- Check GET me/permissions and confirm the required permissions have status granted. Stop if the profile or Page belongs to another company.
GET me/accounts?fields=id,name,instagram_business_account
GET YOUR_PAGE_ID?fields=id,name,instagram_business_account
GET YOUR_INSTAGRAM_ID?fields=id,username,name
GET me/permissions
Replace YOUR_PAGE_ID and YOUR_INSTAGRAM_ID with the values for your own accounts. An email address or Instagram username is not the numeric professional account ID.
8. Connect Instagram in Telfron
- Sign in to your company’s Telfron PBX. Open Integrations / Integration Hub and choose Connect Instagram.
- Account name: enter a label your team will recognize, such as Your Company Instagram.
- Instagram professional account ID: paste the numeric ID verified in step 7.
- Meta user access token: paste the Facebook user token from step 6.
- Optional Meta App ID and App Secret: enter values from the same Facebook app only if your administrator wants token-expiry verification. Keep the App Secret private.
- Click Save and verify. Confirm the account shows connected before preparing a post. The connected account test checks identity and publishing permissions; it does not publish content.
The screenshots earlier in this guide refer to Telfron’s own demonstration accounts. Every customer must use their own credentials. Account credentials are encrypted by the Telfron connector.
9. Prepare a photo or Reel
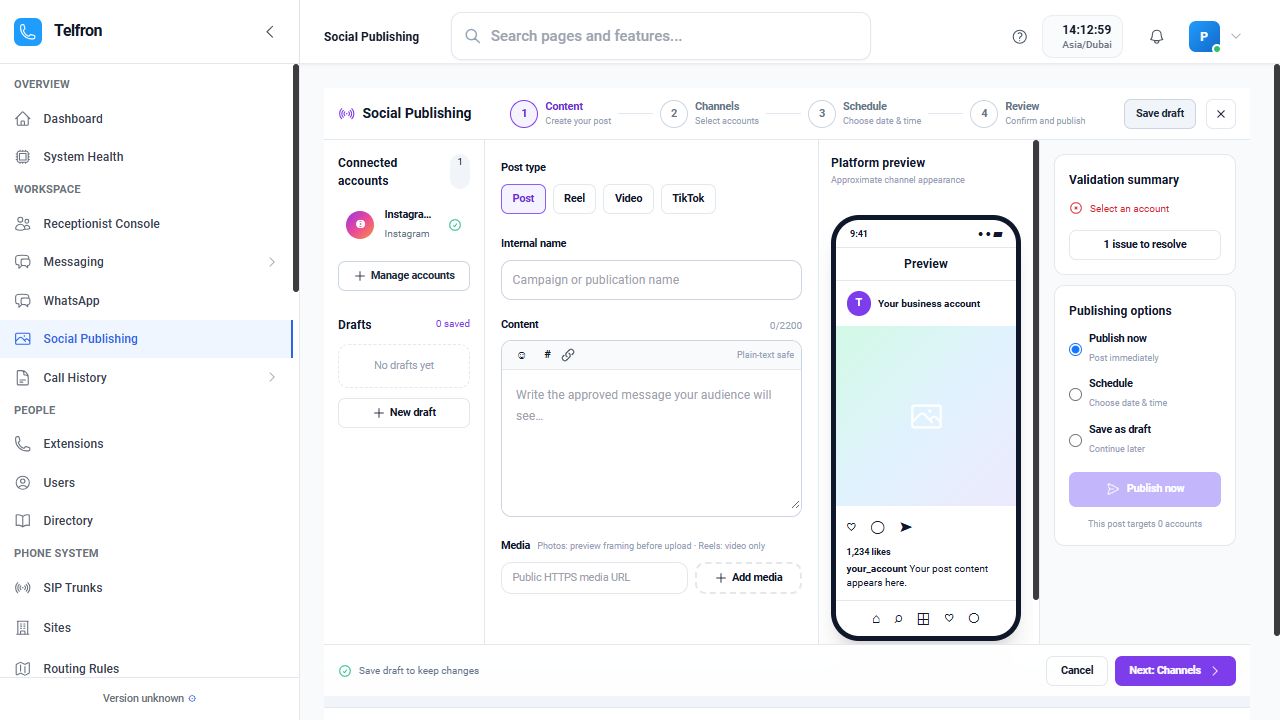
- Open Social Publishing and select the connected Instagram account before adding media.
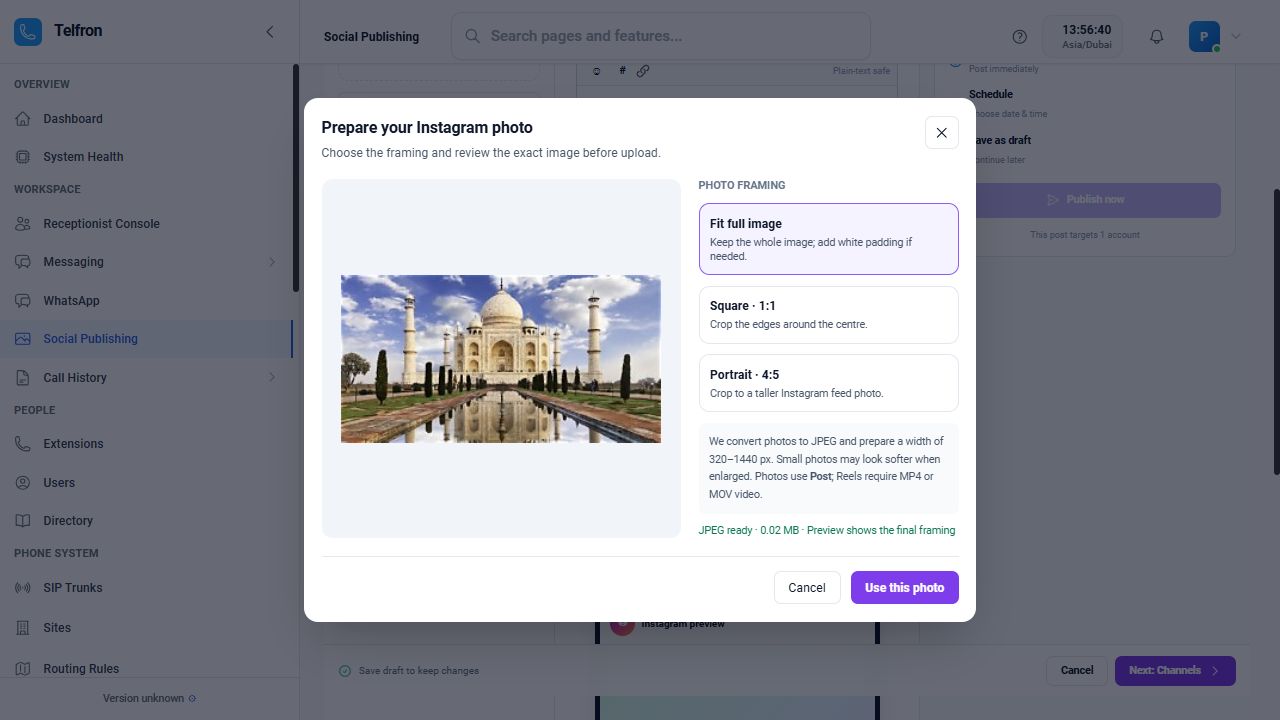
- For a photo, choose Post and Add media. The updated composer accepts JPG, PNG, or WebP and opens the photo preparation preview.
- Choose Fit full image to preserve the full photo, Square 1:1 for a centre crop, or Portrait 4:5 for a taller centre crop.
- Review the exact prepared image, then click Use this photo. The composer converts it to a real JPEG and prepares a width of 320–1440 pixels with an accepted aspect ratio. Small originals may look softer after enlargement.
- For a Reel, upload an MP4 or MOV video. A JPG cannot be used as a Reel. Stories and carousels are not supported in this connector yet.
- Enter the caption and a clear internal name. For Instagram, keep the caption at or below 2,200 characters. Review the validation summary.
10. Review, publish, and confirm delivery
- Review the selected company account, prepared media, caption, and publishing mode. Save as draft if the content is not yet approved.
- For approved content, choose Publish now or set a schedule. Confirm the displayed PBX timezone when scheduling.
- Submit once and wait for the result. Video processing can take longer than photo publishing.
- Check Recent publications. Each selected channel has its own delivery status. Open the Instagram profile to confirm a published post appears.
- If delivery fails, read the visible error first. Correct the cause before using Retry; do not repeatedly create duplicate posts.
Troubleshooting common messages
| What you see | What to do |
|---|---|
| A Reel requires video | Choose Post for a photo, or upload an MP4/MOV for a Reel. |
| Upload a JPEG image or MP4/MOV video | The actual file format may differ from its filename. Re-add it through the photo preparation preview; renaming .png to .jpg does not convert it. |
| Use a valid JPEG between 320 and 1440 pixels wide | Re-add the original photo through the updated composer, review its prepared preview, and choose Use this photo. |
| Image aspect ratio is outside the allowed range | Use Fit full image, Square, or Portrait in the photo editor. |
| Reconnect with a named permission | Regenerate the user token with that permission and authorize the correct assets. Update the Telfron connection. |
| Token expired or invalid | Renew the Meta user token, update the connection, and run Save and verify again. |
| Only an old Facebook Page appears | Check asset selection and Page control. Use the direct Page query in step 7 to verify access; do not connect the wrong account. |
| Media URL is private or requires login | Upload through Telfron’s managed media flow, or use a directly readable public HTTPS URL. Meta cannot fetch localhost or a private LAN address. |
| Social Publishing sidebar is missing | Check license entitlement and user role, then refresh the installed frontend with Ctrl+F5. |
| Preview drops below the editor | Load the latest frontend with Ctrl+F5. On desktop widths of 1200 px or more, the updated composer places the preview beside the editor; smaller windows use a stacked layout. |
Production readiness and official references
- An unpublished app with testing permissions is not the same as an app approved for all customers. Review Meta’s App Review, advanced-access, and business-verification requirements before onboarding accounts outside your app’s authorized test roles.
- Keep each company’s accounts and credentials separate. Confirm the company context before connecting or scheduling.
- Maintain token renewal and expiry monitoring for scheduled publishing. Never publish the token, App Secret, or login credentials.
- The setup screenshots demonstrate account connection and media preparation. They do not prove that a live post was published successfully.
Meta: Instagram API with Facebook Login · Meta: App Review · Meta: long-lived access tokens
Checked against the setup performed on 5 October 2026. Meta may change menu labels and app requirements.